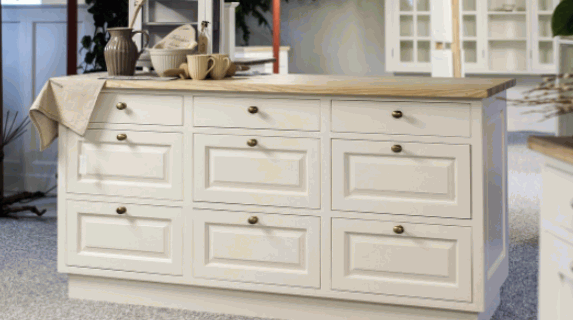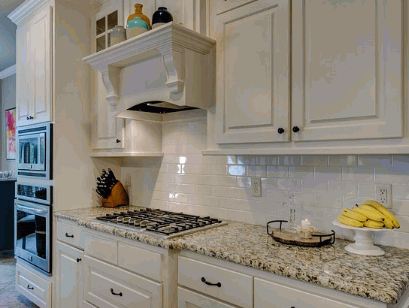
A quick Pinterest search will reveal that painted kitchen cabinets are now trending. Painting your kitchen cabinets is a cheap and simple method to update your space without major remodelling. It is not necessary to use vivid colours. You may completely transform the look of your kitchen by just painting the walls a muted earth colour or a soothing grey.
Since painting your kitchen cabinets requires a lengthy drying time, it's not something you should speed through. Given how much time we spend there, you wouldn't want to be confronted by a shoddy paint job whenever you popped into the kitchen for a snack.
Check out: Kitchen Spray Painters
Table of Contents

It's not always necessary to hire professionals or spend much money to give your kitchen a facelift; sometimes, just painting the cabinets will do the trick.
In the following parts, we'll go into the step-by-step method to walk you through the essentials of how you can paint kitchen cabinets.
Preparation is the first thing that you need to focus on. So, first, you need to clean and sand the walls and cabinet boxes. To ensure the paint will adhere properly, thoroughly clean the surface.
You only need some water and a non-abrasive cloth to remove the grease and prepare the surface for painting. First, clear off the countertops, empty the cabinets, and remove any freestanding equipment. Move the chairs and tables to the living room.
Using plastic dust sheets over doorways, backsplash, windows, and fixed appliances, you must protect the surroundings from fumes and dust. Mask off the wall around the cabinets. Prepare a painting workspace with a table and chairs.

Returning to the home centre after work has begun is a major waste of time. Here are some of the essential tools and equipment that you need to gather before painting kitchen cabinets:
You can use sandpaper to smooth down the surface of your cabinets, making it easier for the paint to adhere. If you use extremely coarse sandpaper, you risk reducing them to wood. We suggest using 120 grit to give them a light polish so the paint will adhere.
The next step is to clean up the area. You shouldn't paint unless the surface is completely clean of dust. A finish on your cabinets can look rough if even a few annoying particles get on it.
Label the kitchen cupboard doors front and drawer with a marker to keep the doors from getting mixed up. This stamp belongs on the reverse side of the hinge. Pull the doors off the cabinet doors by loosening the hinge screws.
Tape each one with a number, moving clockwise from left to right and top to bottom. Don't forget to number the drawer bottoms and cabinet shelf edges. Don't forget to put away the screws and brackets.
Take apart the handles and hinges at your desk and put them in a separate container. Write the door number from the tape on the unfinished wood under a hinge. Use new tape to cover it.
Put on protective gear and open the windows to let fresh air in. Scrub down all surfaces using an abrasive pad coated in a liquid deglosser. Keep a towel below to soak up any spills. Quickly use a clean rag soaked with deglosser to remove the residue before it dries.
Use a two-part auto body filler to cover the screw holes left behind while repositioning the hardware. You should only combine tiny portions, as it sets in approximately 5 minutes. Because of the filler contracts, it is important to overfill the holes slightly.
Use a paint scraper to remove the excess as soon as it dries. Sand it down to a smooth finish if it hardens. Scuff the exterior of the drawers, cabinet, and doors with a foam sanding block. Don't sand down to the raw wood; this is only a mild sanding to help the primer stick.
Before continuing, wipe away the sanding dust with a tack cloth. Clean the cupboards thoroughly using a vacuum cleaner and a tack cloth to remove any dust that may have settled on the surface.
Kitchen cupboards should be primed and dry for a few hours before painting cabinets. To increase the longevity of your paint, we advise using a water-based primer.
Since these materials are often porous and absorbent, a mist coat should be applied as a primer. After sanding, apply a mist coat of 70 percent paint and 30 percent water. After letting this mist coat dry, paint the kitchen cupboards as usual. Two or three coats of paint will give you the desired result.
First, smooth over the flat surfaces with 220-grit sandpaper. After that, smooth out any profiles with a sanding sponge of medium grit. The wood should finish up feeling glass-smooth.
Apply a small amount of latex caulk along any cracks or holes. (A caulk tube's opening should be no larger than the point of a pencil.) While working, pull the tip and smooth the caulk with a wet finger.
Use a vinyl spackle and a putty knife to fill in and smooth out any dings, scratches, or dents. After waiting an hour for the spackle to dry, sand it again with 220 grit paper, vacuum it up, and then wipe it off with a damp cloth.
Spackle and areas where the sandpaper has "burned through" the primer should be spot-primed with a fast-drying oil-based primer sprayed on using spray paint. After an hour, use 280-grit paper to sand the primer softly. Clean everything with a vacuum and a tack cloth.
It's time to use your favourite shade of paint. Begin painting with even strokes inside the frames and move outward. Using a paintbrush to reach all the nooks and crannies is best.
It's best to start by painting the backs of the cabinet and drawer fronts. It's best to wait until they're dry before tackling the front faces.
Don't rush to reinstall the kitchen cabinets unless you want to undo all of your hard DIY work. You should wait about a week for the paint to dry before re-mounting.
Kitchen cabinet varnish is no longer required. A layer of varnish applied after painting can increase the sheen beyond what an eggshell finish can provide. A word of caution, though: waiting for the varnish to dry before re-mounting your cabinets will only lengthen your overall process.
You can reattach the doors and drawer fronts once the second coat of paint has dried. Take pride in the knowledge that you updated the appearance of your kitchen cabinets without spending a fortune.
Remove the masking tape from the door numbers, replace the hardware, and hang the doors where they go.
Discover: How Much Does It Cost To Spray Paint Kitchen Cabinets

Priming the cabinet surface before painting ensures the fresh paint will adhere well to the wood. A kitchen cabinet's glossy finish or exposure to cooking fluids and grease can render the surface nonporous and slippery.
Once a decent primer has etched into the surface, the paint will have something to grab. Paint is less likely to stick after application if you do not use this adhesive base.
You can improve the adhesion by thoroughly cleaning and lightly sanding the cabinet surfaces. After you remove the dust, prime the cabinets with a product created specifically for this. Do not proceed with painting until the priming has dried.
Kitchen cabinets can collect grime over time from various factors, including food, water, and human contact. These stains will seep into the paint without adequate sealing, leaving behind ugly blotches and an uneven surface.
By sealing these trouble spots with a stain-blocking primer, you may avoid having any preexisting stains mar your new paint job. When picking a primer for your kitchen cupboards, search for materials labelled as "stain-killing."
Water stains, cigarette burns, and tannin bleed from wood are no match for these primers' ability to cover them all.
If you want your paintwork to seem professional, you need a uniform base. Primers hide flaws in the wood's surface or grain pattern that would otherwise be visible after painting. It also makes sure the paint colour is uniform throughout the area.
Use a brush or roller to apply a thin, even coat of primer for the best results. It may take more than one coat of primer to establish a homogeneous base on your cabinets if they have a strong wood grain or dark colours from prior paint. Before moving on to the next layer, ensure the previous one is dried.
Because of the high humidity, high temperature, and high kitchen cleaning frequency, durability is paramount. Priming before painting adds an extra layer of protection that helps the final coat last longer and look better. To maximise the lifespan of your paint job:
Priming a surface before painting can reduce the amount of paint you need. Primer is usually more cost-effective than paint and can speed up the painting process.
Applying a coat of primer first can keep you from using as many applications of more expensive paint. It will cover up the existing cabinet colour and serve as a blank slate upon which the new paint colour may pop. It is especially relevant when switching from dark to bright colours.

Paints designed specifically for painting kitchen cabinets work equally well on wood and acrylic. But remember that non-solid wood finishes like laminate, vinyl, or stainless steel are harder to paint since the paint can flake or chip. Painting laminate-finished cabinets calls for using a bonding primer before painting.
Preparation is the key to a successful cabinet painting project. You need to sand down the cabinets before your first coat of paint so the new paint has something to adhere to. You don't have to sand the cabinets if it is bare wood. Try light sanding with a sanding sponge if your cabinets have a factory finish.

It is not something to be rushed on a lazy Sunday. It's tempting to slap on a coat of paint quickly and thickly, but you'll be sorry you did when even a small scratch removes a large section of colour.
The right paint should be applied in small layers over five to seven days, with dust softly wiped away. It will allow a smooth finish to the cupboards.
Allow the primer a minimum of four hours to dry and the paint a minimum of 24 hours between applications. Doing this ensures that each layer properly cures and helps avoid bubbling or peeling.
Plan on using at least two coats of colour and possibly more for a deep, rich look. Ensure that you apply each layer evenly for uniform saturation.
If you want a sleek, contemporary look, use a fine foam roller; go with brushes for a more traditional, painterly look. High-quality brushes don't shed bristles.
You can avoid filth and grease accumulation with routine cleaning with mild, non-abrasive cleansers. Fix any chips or scratches to safeguard the wood underneath immediately. Your kitchen's new design will last years with the right maintenance.
Explore: Vinyl-Wrapped Kitchens Or Spray-Painted Kitchens

Selecting high-quality and right paint is essential when painting kitchen cabinets. Several paint finishes, such as matt, gloss, and satin, are available. Your preferred aesthetic will determine the finish you go with. Before beginning your kitchen cabinet makeover, check the back of the paint can to see if an undercoat is necessary.

If you want to give your kitchen a new look, a faux finish can give it a country cottage, provincial, or contemporary vibe. It is easy to give your cabinets an aged appearance using crackling glaze, which you can find at most paint stores.
You may use some paint trickery to obtain the same tarnished, gently aged look. Using a paintbrush, lightly scrape the surface of the detail corners, trim, and seams with a colour lighter than the cabinets, then blot the excess paint onto a cloth.
A high-gloss finish, on the other hand, will make your kitchen look sleek and contemporary. To brighten your cabinets, apply a varnish. This method will give your kitchen's surfaces a glossy sheen and deeper colour.
Without requiring major repairs, painting kitchen cupboards is an affordable and dramatic do-it-yourself project that may dramatically improve the appearance of your kitchen. This idea is popular, as seen by how often it appears on websites like Pinterest, proving that a colour change can give your room a new look.
But one should not hasten the procedure. Your project's success depends on the drying period, so be patient, and you'll have a finished kitchen you can be proud of every time you go in.
You can ensure that your painted cupboards withstand use and the test of time by carefully following the instructions, which cover everything from preparation to the last coat. Recall that when you paint kitchen cabinets, it needs to be with care that will produce a polished finish that fits into your daily routine and improves the visual appeal of your house.